Groom Tool Context
Tool Settings
When in the Groom context the Tool Settings window will present many of the tools you can use to comb, sculpt, trim and paint the strands as well as offering control over mirroring and update frequency.
Brush Settings
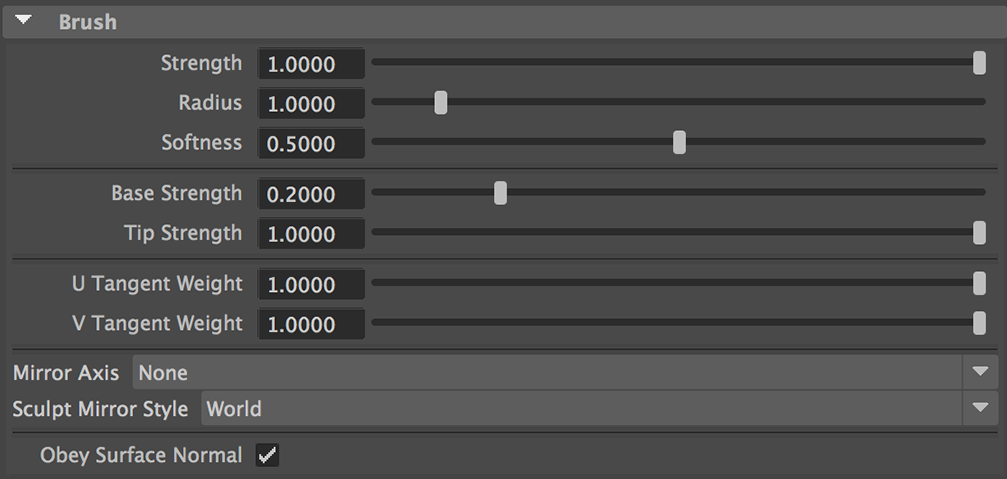
| Attribute | Description |
|---|---|
| Strength | Strength of the brush. |
| Radius | Radius of the brush. |
| Softness | How soft the brush is, this controls the falloff from the centre of the brush to the full radius. |
| Base/Tip Strength | Control the brush strength along the length of the strands. |
| U/V Tangent Weight | Used to control how the U and V tangents are mixed when using the Tangent brush. |
| Mirror | Choose an axis to turn mirroring on. |
| Sculpt Mirror Style | Use World to mirror the sculpt brush in world space, or Screen to do so in screen space. |
| Obey Surface Normal | Used to determine if strands facing away from the stroke will be affected. |
Hotkeys
| Key | Use |
|---|---|
| CTRL+LMB | Select strands, CTRL-clicking in empty space will clear the current selection. |
| CTRL+RMB | Deselect strands. |
| B | Adjust the brush size. |
| M | Adjust the brush strength. |
| C | Will lock the end points of each strand (v4.0) |
| CTRL-Z | Undo |
| CTRL-SHIFT-Z | Redo |
Selection
While grooming it's possible to select and de-select strands to limit the effect of the brush, to do this hold down the CTRL key and the first mouse button to select points and the CTRL key with the second mouse button to deselect points. You may find that while working on a groom you may want to only see strands you have selected, this is possible by toggling on the Isolate Selected attribute in the grooms Display palette.
Grooming Tools

Populating
When populating you are adding or removing strands from the groom, depending on parameters selected you may be arbitrarily adding points to the surface or the new surface points can be constrained to the vertex positions.
| Tool | Icon | Description |
|---|---|---|
| Add |  | Used to add strands to the groom, only a single strand will be created within the radius of the brush. |
| Delete |  | Used to remove strands from the groom. |
| Scatter |  | Add strands by scattering them on the surface under the brush as if using a spray can. |
Combing
Combing tools affect the strands based on their surface position with the effect generally based on their relationship to the underlying surface and surrounding strands.
| Tool | Icon | Description |
|---|---|---|
| Comb |  | The most familiar mode where the stroke pulls the strands in the direction of the brush stroke. |
| Direction |  | This will change the orientation of the strand but not it's shape. |
| Lift |  | Lift the strands off of the surface of the mesh. |
| Straighten |  | Straighten out the strands shape across the length using the base as a normalized direction. |
| Smooth |  | Smooth out the strands to create a more even groom. |
| Move |  | Move strand around the surface of the input geometry. |
| Scale |  | Uniformly scale the strands, this differs from length as you're not altering the strands shape. |
| Clump |  | As the brush moves the strands will clump towards a point on the surface at the beginning of the stroke. |
| Twist |  | Twists the strands around the center axis of the brush. |
| Tangent |  | Aligns the strands to the surface tangent. |
Sculpting
Sculpting acts on the strands in world space. While sculpting the groom is less concerned about strand to strand relationship and focused on the over all shape/mass of the groom.
| Tool | Icon | Description |
|---|---|---|
| Sculpt |  | Sculpt the volume of strands. |
| Trim |  | Trim away the ends of strands, as if you were using a plane/scissors to cut them. |
Workflow and Settings
The last few tools in the Tool palette are to help with Workflow as well as a general setting which controls how often graphs are evaluated when painting.

| Tool | Icon | Description |
|---|---|---|
| Flood Fill | Flood fill using the currently selected tool. | |
| Deselect | Deselect strands previously selected with the CTRL hot key. | |
| Invert Selection | Invert the current selection. | |
| Mirror Selection | Mirror the current selection. | |
| Undo | Undo the last action (CTRL + Z). | |
| Redo | Redo the last action (CTRL + SHIFT + Z). |
Attribute Painting
Besides used to adjust the shape of strands Yeti Grooming allows any number of custom attributes to be painted.
Attribute Painting is used to control attributes that generally represent one value per strand where the interaction takes on a more painterly feel vs. adjusting the strands directly, this includes length ( which is always available ), density and width.
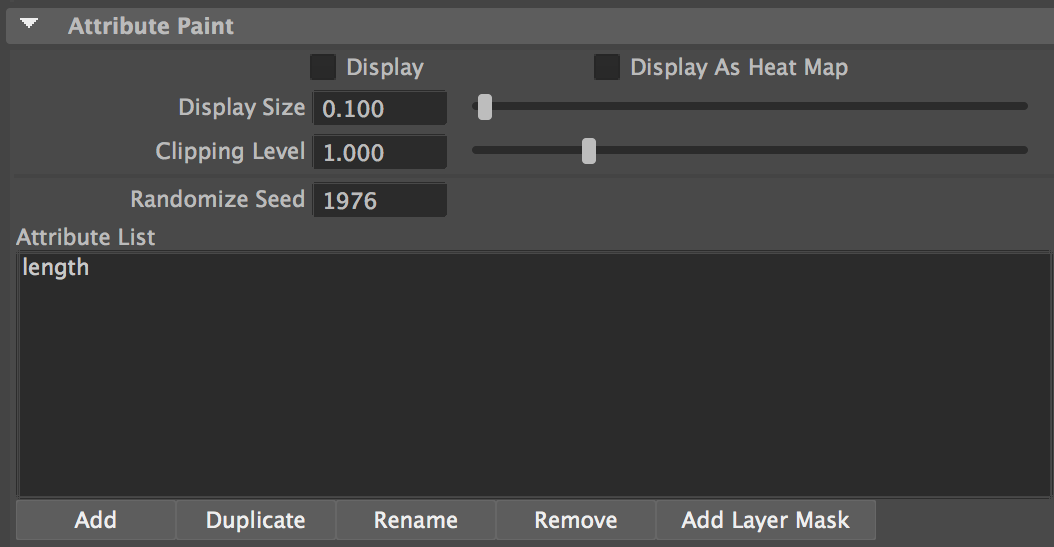
Except for Length any other attribute needs to be added before painting - using the four buttons at the bottom of the palette a user can Add, Duplicate, Rename and Remove attributes ( except Length ).
To start painting an attribute double-click on it's name in the Attribute List, all the brush parameters will affect the attribute paint as expected.
| Attribute | Description |
|---|---|
| Display | Turn attribute display on/off. |
| Display As Heat Map | Will draw the displayed paint values as a heat map vs. a greyscale representation of the values. |
| Display Size | Size of the attribute in the viewport. |
| Clipping Level | An attribute is treated as an HDR value which means it's possible to paint above 1.0 - by adjusting the clipping level you can change. |
| Randomize Seed | The seed to use with the Random brush. |
Attribute Paint Tools
When in the groom context specific Attribute Paint tools can be used - the Attribute Paint Value is controlled via a monochromatic colour (only floating point attributes can be painted at this time).

| Tool | Icon | Description |
|---|---|---|
| Paint | Paint the current value on the surface. | |
| Increase | Increase the current attribute by the paint value. | |
| Decrease | Decrease the current attribute by the paint value. | |
| Smooth | Smooth out the painted values modulated by the brush strength. | |
| Random | Randomize the painting effect. | |
| Sample | Used to sample the attribute value already painted. |
Add Layer Mask
When a groom is used as an input to a Deformation Layer a layer mask can be used to paint and isolate the effect of the groom like an alpha channel.